Knowledge Base
Getting Started with Creative
Table of contents
- Installation
- Customize
- Make Your Site Look Like The Demo
- Homepage Slider
- Header
- Creating Content
- Adding Social Links
- Typekit Fonts
- Dribbble Portfolio Importer
- Theme Measurements
Installation
Add Creative Theme
- From the Dashboard of your site, go to Appearance → Themes.
- Click the Add New button at the top of the screen.
- Click the Upload Theme button at the top of the screen.
- Select Choose File and find the .zip file of the theme, select it, and click Add, followed by Install Now.
- The theme will upload then ask whether you would like to Activate, view a Live Preview, or Return to Theme page. You can activate or view the theme from this screen or do it later in the Appearance → Themes screen.
Setup Automatic Updates
Automatic updates will enable you to know when bug fixes and updates have been pushed by the development team, and provide a notification in the WordPress Dashboard when they are available. Adding your license key will also activate Typekit fonts. The license key must be renewed annually to continue to receive bug fixes, updates, and the use of Typekit fonts.
Warning:
Be aware that if you have made any modifications to the CSS or PHP files and run an update, all changes will be blown away! We highly suggest if you want to make theme modifications to do so by creating a Child Theme.
- From the Dashboard of your site, go to UpThemes.
- Paste the License Key you received in the purchase email from UpThemes into the License Key field.
- Click Save Changes.
- Click Activate. You will see a green “active” marker if the license key was entered successfully. If not, please email support for assistance.
Customize
Show your personality off and make your site reflect you. The Creative Theme offers a number of options to make your site unique from the Live Customizer. The Customizer can be found under Appearance → Customize.
Site Title & Tagline
Set the Site Title and Tagline for your WordPress site.
Theme Settings
Add text copy to the footer.
Portfolio Settings
Choose the number of columns you would like the Portfolio items to display in.
Color
Set custom colors for the Header Text and site Background Color.
Header Image
Add a custom image (or logo) to the Header.
Background Image
Add a custom Background Image to the site and specify its positioning and whether it should tile.
Navigation
You can set the position of Menus from the Customizer if you like.
Static Front Page
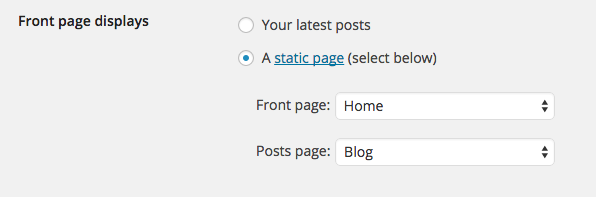
Choose a static front page like shown above.
Featured Content
Set up the tag for the Featured Slider and manage Featured Slider options. For more about the Feature Slider check out Setup Featured Content Slider.
Widgets
Setup widgets in the four available footer zones.
Make Your Site Look Like The Demo
- Install and activate the widget import/export plugin.
- Install and activate the WordPress import/export plugin.
- Download this ZIP file containing the widget export file and content export file.
- Unzip the file to your desktop. You will now have a `.xml` file and a `.wie` file.
- In your WordPress admin, go to Tools > Import > WordPress.
- Upload the `.xml` file from your desktop.
- Check the box to import attachments if you wish, then click ‘Import.’
- All posts and menus should have been imported to your WordPress site.
- Next, you will install your widget export file.
- In your WordPress admin, go to Tools > Widget Importer & Exporter.
- Click Choose File and select the `.wie` file from your desktop and click Import.
- Widgets should now be fully imported.
- You may need to assign custom menus if you do not see them on the front-end of the theme.
- To do this, go to Appearance > Menus.
- Select the Main from the drop-down, then click Select.
- Scroll to the bottom of the menu items in the list and check the box for Primary Menu.
- You will still need to set up your homepage slider follow the next section for directions.
Homepage Slider
Showcase your favorite work by setting featured content
Setup Featured Content Slider
- From the Dashboard of your site, first activate Jetpack
- Go to Appearance → Customize.
- Expand the Featured Content section in the Customizer.
- Add a word to the Tag Name field, we suggest using the word featured to keep things simple since this is the Feature Content Slider.
- You also have several customization options here, you can hide the custom tag from the item page, select the Featured Slider Transition Style, change the Featured Slider Animation Speed, and change How Long Each Slide Should Be Show.
- Click the Save & Publish button and Close the Customizer.
- Portfolio items and Blog Posts both can be added to the Feature Slider. To do so, go to the Portfolio item or Blog Post that you would like to add, and add a tag using the custom word from Step 3 (we suggested using the word featured).
- Update the Post or Portfolio and head over to the homepage of your site to check out the super duper awesome Feature Slider!
Featured Images
The image that will show up in the Featured Content Slider on the Homepage is whatever image that is set as Featured Image on a Portfolio item or Blog Post.
- Open the Portfolio or Blog Post you would like to add to the Featured Slider.
- Along the right side column you will see a Featured Image block, click the Set featured image link.
- Upload an image or navigate to an image in the Media Library.
- When you select the image you like press the Set featured image to confirm.
- Press the Update button to save any changes. Remember, the Portfolio item or Blog Post must have the correct tag associated with it for the item to be displayed in the Featured Slider.
Note:
We suggest making all Featured Images for items you want to add to the Featured Slider that same exact size. So for example, make all images that will be in the Featured Slider 1400×600 pixels or whatever you like. The size of the Featured Slider will adjust to fit the images, which is great because it let’s you decide what size you want images to display at, but if you use different sized Featured Images it can look a little weird when the Featured Slider rotates between images.
Header
The customized header allows you to add your own look behind the logo and navigation area.
- Go to Appearance → Customize
- Click Add new image
- Select an image, click Select and Crop
- Select Crop Image or Skip Cropping (the recommended size is 1600×85)
- You will see your new header.
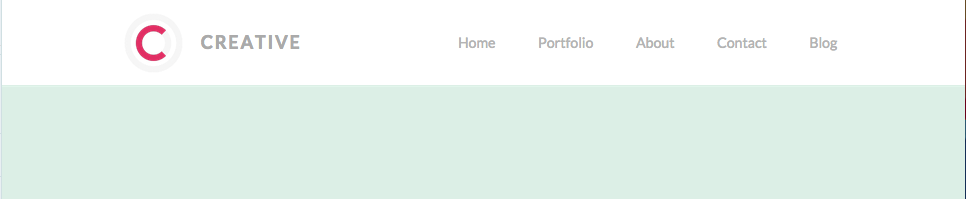
Before Customized Header

Example of Customized Header
Creating Content
Portfolio Items
The custom Portfolio post type allows you to display projects with additional details, and display the project on the Homepage Featured Slider.
Freefolio
You need to have a Portfolio content type available to setup a Portfolio. The content type is available by activating the Freefolio plugin.
- Download the Freefolio plugin or install from the site Dashboard. For instructions on adding a plugin follow the plugin installation instructions.
- Activate the plugin. You can do this by going to Plugins → Freefolio → Activate.
Add New Project
- From the Dashboard of your site, go to Portfolio
- Click Add New.
- Enter a Title (Required).
- Enter a Description. You can add text, images, and more here, so feel free to go crazy.
- Choose post Format
- Add Tags. Since we are working with a custom Portfolio Post Type, these tags will not be displayed on the item page, instead use the Project Tags option to tag projects.The only reason to tag Portfolio items here is to add the custom tag you used for the Featured Slider, to learn how the Slider works check out Setup Featured Content Slider)
- Add Project Types. Project Type will affect the categorization and filtering options on the main Portfolio listing page.
- Add any Project Tags. Project Tags for Portfolio items replace the standard WordPress tags, but only for Portfolio items.
- Set Featured Image. The featured image will show as the thumbnail image on the Portfolio archive page, and in the Featured Slider if you add this project to the Slider.
- Click Save Draft, or Publish if you are ready to push the project live.
Project Types
Project Types are custom categories that describe a project. For designers, you could have a variety of project that fall into different categories, such as Brand, Design, Development, iOS, and more. Project Types are completely custom and can be specified on a per site basis.
Add New Project Types
- Go to Portfolio → Project Types.
- Enter Name (Required)
- You can have WordPress automatically generate the slug based on the Project Type Name or customize it here. (Optional)
- Select a Parent topic if you want to nest the topic under another topic. (Optional)
- Enter a Description. (Optional)
- Click Add New Project Type.
Project Tags
Project Tags are unique in that they are only associated with the Portfolio post types. Project Tags replace the standard tagging method WordPress uses to tag post.
Add New Project Tag
- Go to Porfolio → Project Tags.
- Enter Name. (Required)
- You can have WordPress automatically generate the slug based on the Project Type Name or customize it her. (Optional)
- Enter a Description. (Optional)
- Click Add New Project Tag.
Adding Social Links
Add all your favorite social icons to show people where they can find you.
Create Social Menu
- Click Appearance → Menus.
- Click Create New Menu.
- Enter a Menu Name.
- Click Create Menu.
- To the left of Menu Structure, click the Links tab.
- Enter the link to one of your social media profiles in the URL field and add whatever Link Text you like (Ex: Upthemes on Twitter). Click Add to Menu.
- Add any other social links the same way.
- In the Menu Settings section, check the box next to Social.
- Click Save Menu.
Typekit Fonts
The Creative theme comes with the Typekit fonts Brandon Grotesque and Skolar Web built into the theme for excellent typographic balance. The best part is you don’t have to have a Typekit account for this awesomeness!
Remember, in order to use Typekit fonts, first activate your license key. The license key must be renewed annually to continue to use Typekit fonts.
Dribbble Portfolio Importer
The Freefolio plugin makes it quick and easy to import your work from Dribbble directly into your WordPress site.
Download the Freefolio plugin or install from the site Dashboard. For instructions on adding a plugin follow the plugin installation instructions. Once you have a copy of Freefolio installed go ahead and Activate the plugin.
Connect a Dribbble account
- While in the WordPress Dashboard, navigate to Settings → Writing.
- Find the section titled Your Custom Content Types.
- Enable the Portfolio Projects type.
- While in the WordPress Dashboard, navigate to Tools → Dribbble Importer.
- Enter your Dribbble Username.
- Click the Save Changes button.
- Click the Import Shots From Dribbble button.
- Wait for the import to finish – it may take up to 15 minutes for all shots to be imported.
You’ll notice a new menu option in the WordPress Admin navigation titled Portfolio, this is where the importer will save your Dribbble shots. Enjoy!
Theme Measurements
Quick Specs (all measurements in pixels)
- The main column width is 670px.
- Header image is 1600×85.
- Featured images work best with images that are least 1000px wide.
- The primary sidebar (right) width is 290px.
- Widgets in the footer widget area are 300px wide.
- The header image suggest size at least 200px tall, the width can vary and the image will scale to fit inside the header.
- Portfolio images should be at least 800px wide and a 5:4 ratio is recommended.