Knowledge Base
Getting Started with Gallery
Table of Contents
- Overview
- Installation
- Custom Headers
- Custom Backgrounds
- Custom Colors
- Layout Options
- Adding Social Links
- Adding Content from Third-Party Networks/Sites
- Link Post Format
- Widgets
- Theme Measurements
Overview
The Gallery theme has been rewritten from the ground up to be faster and easier to personalize.
Installation
Add Gallery Theme
- From the Dashboard of your site, go to Appearance → Themes.
- Click the Add New button at the top of the screen.
- Click the Upload Theme button at the top of the screen.
- Select Choose File and find the .zip file of the theme, select it, and click Add, followed by Install Now.
- The theme will upload then ask whether you would like to Activate, view a Live Preview, or Return to Theme page. You can activate or view the theme from this screen or do it later in the Appearance → Themes screen.
Setup Automatic Updates
Automatic updates will enable you to know when bug fixes and updates have been pushed by the development team, and provide a notification in the WordPress Dashboard when they are available.
Warning:
Be aware that if you have made any modifications to the CSS or PHP files and run an update, all changes will be blown away! We highly suggest if you want to make theme modifications to do so by creating a Child Theme.
- From the Dashboard of your site, go to Appearance → Customize.
- Paste the License Key you received in the purchase email from UpThemes into the License Key field.
- Click the Activate button and Save Changes. You’re good to go, and should receive notifications when theme updates are available!
Custom Headers
The header image dimensions are 1800×680 but can be any size.
Note:
The image will be stretched to cover the header area at all times. That means a square image will appear cropped for widescreen displays.
How to change the header image:
- From the Dashboard of your site, go to Appearance → Customizer.
- Expand the Header Image section in the Customizer.
- You can select a previously uploaded image, or add a new image by clicking the Add new image button.
- You can drag-and-drop an image into the Upload Files section, or search your computer by clicking the Select Files button.
- After the image uploads click the Select and Crop button.
- WordPress will offer an option to crop the image or skip. If you don’t want to crop the uploaded image, click Skip Cropping. The crop box is set at the suggested ratio, so we recommend not changing the crop ratio, but position the overlay to the desired crop and click the Crop Image button.
- Shabam! Wait a few seconds and the Customizer will update to display what the Header will look like with the new image. If all looks good, click the Save & Publish button and you are good to go!
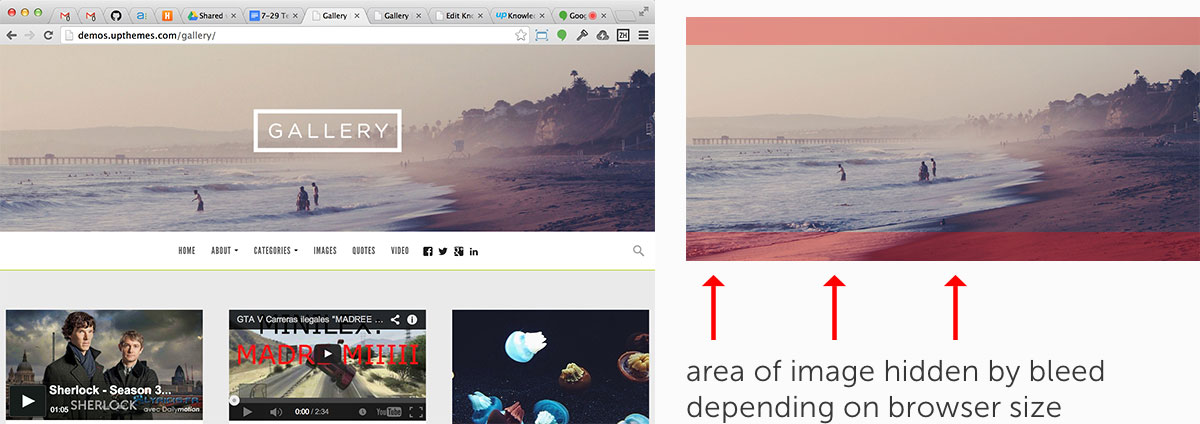
Example of how the full bleed image works.
Custom Backgrounds
Gallery supports custom backgrounds.
To change the background image:
- Navigate to Appearance → Background.
- Select one of the existing images or upload a new one by clicking ‘Choose File’ then ‘Upload’
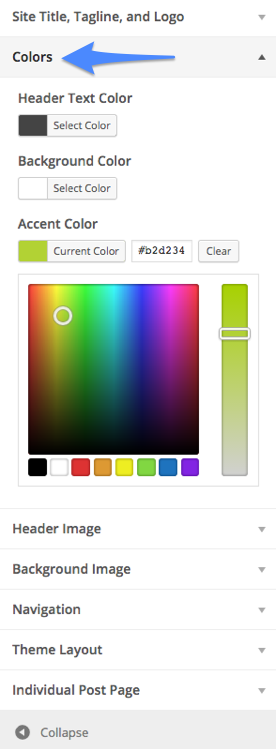
Custom Colors
- Go to Appearance → Customize
- Then choose Colors and you can see you can choose your header, background, and accent colors.
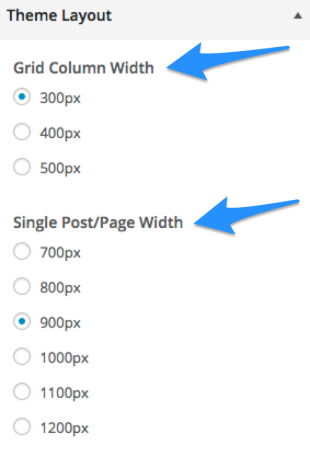
Layout Options
- Go to Appearance → Customize
- Choose Theme Layout
- Here you can choose the width of the grid column and the width of the primary column on single posts and pages. Depending what size you choose the page layout will change.

Adding Social Links to Navigation
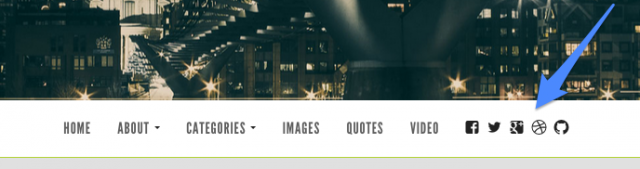
Gallery contains a custom social menu with popular social menu icons that are displayed in the header. It currently supports the following social networks:
- WordPress.org
- WordPress.com
- Dribbble
- Google+
- Github
- Tumblr
- YouTube
- Flickr
- Vimeo
- Codepen
To add links to your social networks, follow these instructions:
- From the Dashboard go to Appearance → Menus.
- Click Create New Menu.
- Enter a Menu Name.
- Click Create Menu.
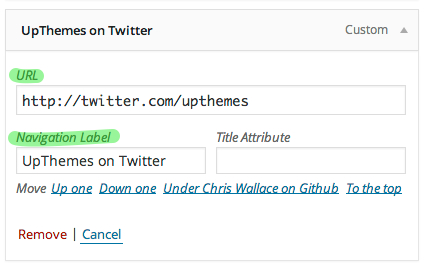
- To the left of Menu Structure, click the Links tab.
- Enter the link to one of your social media profiles in the URL field and add whatever Link Text you like (Ex: Upthemes on Twitter). Click Add to Menu.
- Add any other social links the same way.
- In the Menu Settings section, check the box next to Social.
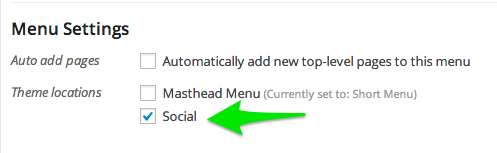
- Click Save Menu.
- You will now see your social links in the navigation area

Adding Content from Third-Party Networks/Sites
Gallery is unique in that it allows you to display embedded media content on your index/archive/search pages, as well as inside your post content.
How It Works
Whenever the Gallery theme finds embedded media from a third-party provider, it will automatically display the first media item on index/archive/search pages. For example, if you placed the following URL in the content of a post, the media from that URL would show up on grid layouts in place of the featured image.
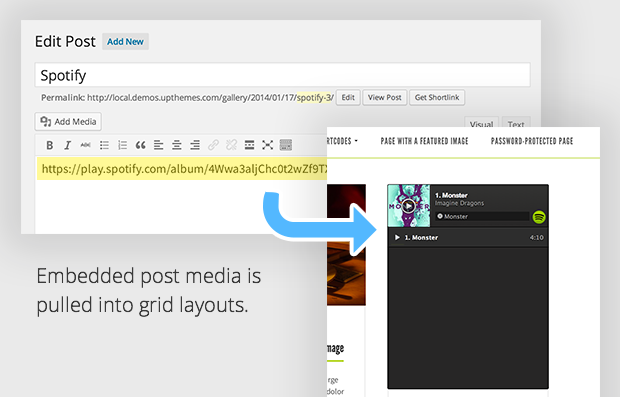
This feature has been tested with some of the major oembed providers, such as Vimeo, YouTube, Rdio, Spotify, and Soundcloud, but may not work for providers with a minimum embed size greater than 300 pixels, due to the size of grid layout items.
Link Post Format
When using the “link” post format, the first link found within the content of the post will replace the primary heading permalink from any archive or listing template. That means visitors will be able to click the title of a “link” post and go directly to the URL you linked.
Widgets
The Gallery theme offers a widgetized zone in the footer. One aspect to note is that you have the option of a two or three column block of widgets depending on the number of widgets you add to the footer. If you add widgets in multiple of threes (3, 6, 9, 12, and so on) the widgets will display in a three column grid. If the number of widgets are not a multiple of three then they will display in a two column grid.
Theme Measurements
- The content width is 620px wide.
- Featured images are set to display at 620px wide by unlimited height.