WordPress 4.1 has been released! With it’s launch comes Twenty Fifteen, the new default theme for WordPress. This new default theme is loaded with some great customization options. In addition to the basics like a custom header image, multiple layouts, custom backgrounds and beautiful post images, users can select and preview a variety of custom color schemes that can change the entire look of your site.
Even though Twenty Fifteen is easily the most customizable default theme ever, it does not come packaged with the ability to customize fonts. That’s where our free plugin, Typecase, comes in.
Easily Choose from over 650 Typefaces from Google Web Fonts
With the release of the new default theme for WordPress 4.1, we’ve added the ability to customize fonts for all the default themes of recent years, including Twenty Ten, Twenty Eleven, Twenty Twelve, Twenty Thirteen, Twenty Fourteen, and of course, the one we’re talking about today, Twenty Fifteen.
Google Web Fonts has been quietly increasing its selection of fonts over the years and now sits at an impressive 657 beautiful fonts available to use on your website (free of charge). With that kind of selection, quality, and price, it has quickly become the #1 source of fonts on the web, far surpassing any paid service. Typecase is a plugin that allows you to use any of these 657 fonts for your own website, making it easy to add these custom fonts to various parts of your WordPress website without writing a line of code.
Add Custom Fonts to Any WordPress Default Theme
In the past, Typecase required users to have a tiny bit of knowledge about CSS (Cascading Style Sheets), however, we have recently been developing a new feature that allows any theme author to add custom fonts to their WordPress theme with just a few simple lines of code.
In order to add custom fonts to your site, simply install Typecase, activate it, then click Typecase in the navigation menu. You should see a screen like this:
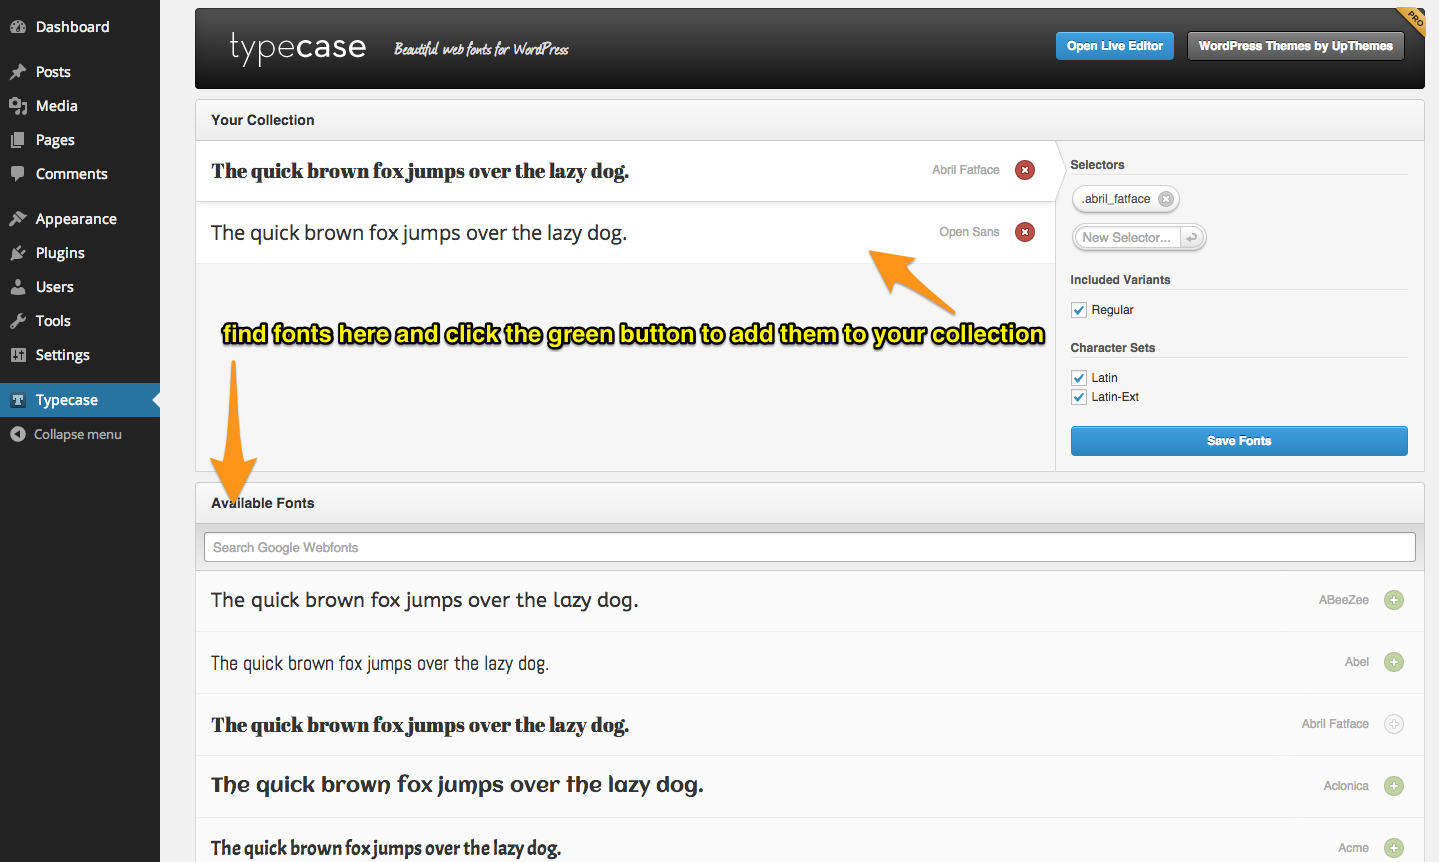
At the bottom of the screen, you can browse and add font families that will be added to your website. Simply browse the list of fonts and click the little green (+) button to add fonts you’d like to use. Once you’ve selected the fonts you want to use, go to Appearance > Customize from the navigation menu.
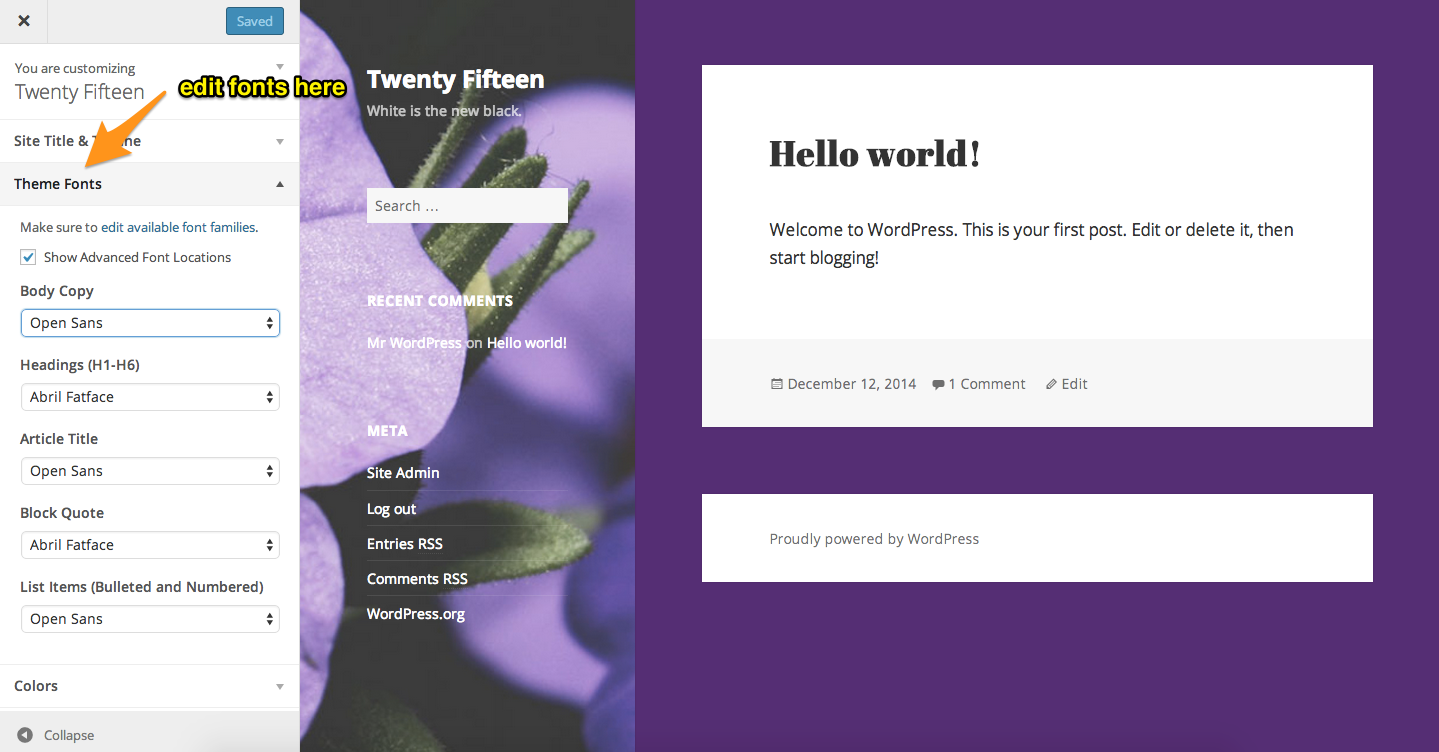
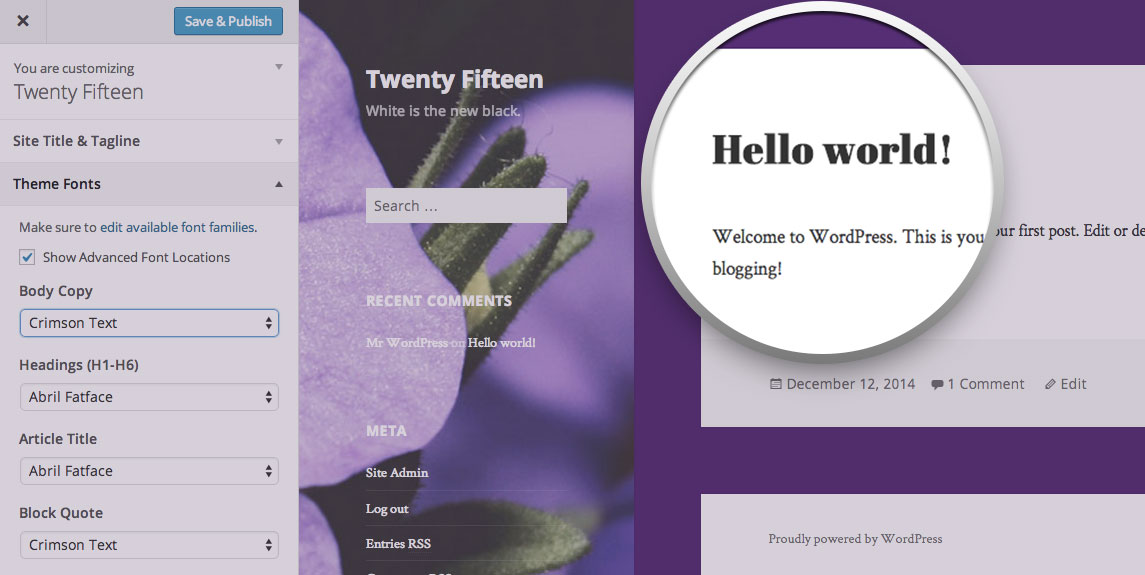
In the left column, you will now see a section called “Theme Fonts.” Use this section to attach the fonts you selected in the previous screen. By default, there are just a couple font locations, but you can check the box labeled “Show Advanced Font Locations” to attach fonts to more specific areas within the theme.
Once you’ve selected the families you want to use for each part of the theme, you should click “Save Changes” and then view your live site to see the beautiful new fonts.
How do I define custom fonts for other parts of my site?
With Typecase, it is possible to define custom CSS selectors that each font family can be applied to. Simply browse to Typecase in your administrative menu, then select the font family you wish to assign and add a CSS selector.
With this plugin, you can customize fonts for any theme without writing code or modifying your theme in any way.
How can I add support for Typecase to my theme?
It’s easy! Simply declare theme support for Typecase like this inside your theme. You can set up all the arguments needed to make your theme’s fonts easily customizable without bloating your theme with extra code. We also recommend using Thomas Griffin’s excellent Plugin Activation class to declare Typecase as a recommended plugin for users of your theme. This makes it easy to keep your theme code lightweight with 650+ fonts available for your users to add to their WordPress website.
Is there a font in Typecase which is similar to Metric? Or otherwise Arial?
You might try this list:
http://theultralinx.com/2013/03/5-google-web-font-alternatives-helvetica-arial.html
I think those are probably your best bet.